Bi-pod Lock Lever Installation
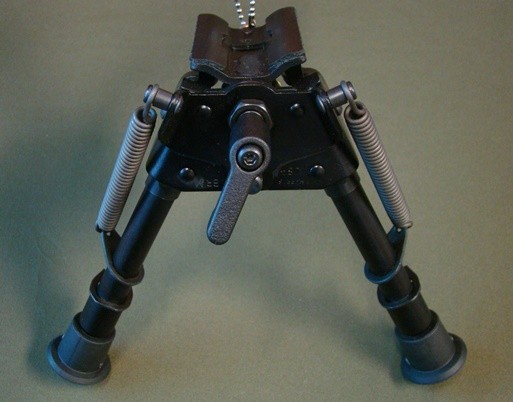
Swivel Bipods are almost necessary for accurate repeatable long-range precision shots. Depending on theory, many suggest that the weapon should be able to swivel with a little force however should “stick” in the desired position requiring zero muscle or effort to hold the weapon in place. The OEM Harris Swivel bipod does allow for tightening the tension on the swivel mechanism however it is a small wheel nut and it’s difficult to get the proper adjustment. With a Bipod Lever Lock the operator can quickly and easily adjust the tension on the bipod without coming off the weapon system. The Bipod Lever Lock also allows for a more precise adjustment than does the OEM wheel nut.

Before starting work on any firearm be sure that the firearm is clear. Do not touch the trigger until the firearm has been cleared. Inspect the chamber to ensure that it is clear of ammunition and that there is no ammunition positioned to be chambered. If possible, remove the bolt from the rifle before starting work. Do not keep live ammunition near your work-space Once you have checked the firearm, check it again! And again!
Tactical Works, Inc. takes no responsibility for the accuracy and/or safety of this “how to”. This post is simply for your reading enjoyment. Before shooting any firearm have it inspected by a qualified gun smith.
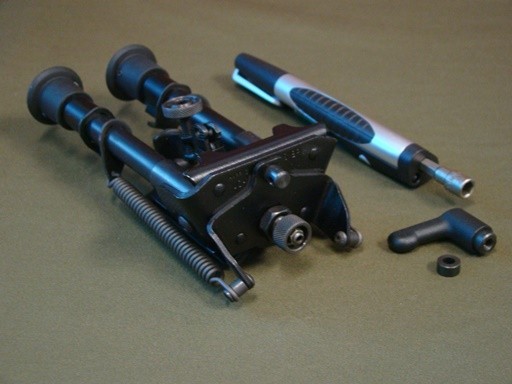
Installation of a Bipod Lever Lock
Tools:
- 1/4″ Nut Driver
Total Time:
- Work Time: 5 minutes
- Total Project Time: 5 minutes
Step 1: Remove the inner nut of the OEM knurled wheel nut.
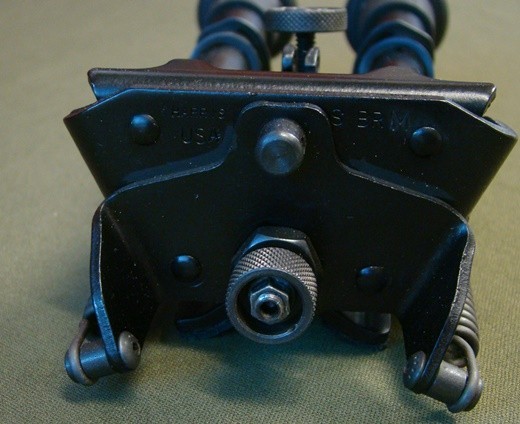
To remove the inner nut use a 1/4″ nut driver.
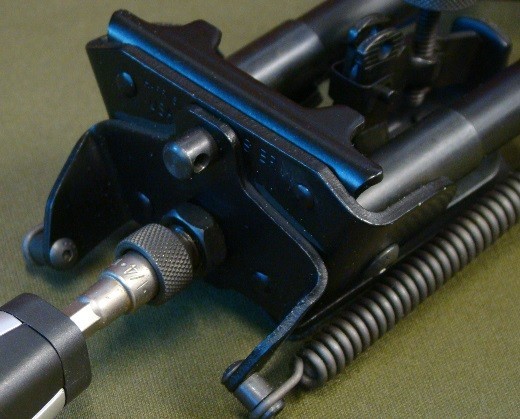
Once the inner nut is removed, find the locking pin on the back side of the swivel mechanism and secure in place with your finger. Locking pin is installed against the brass washer.
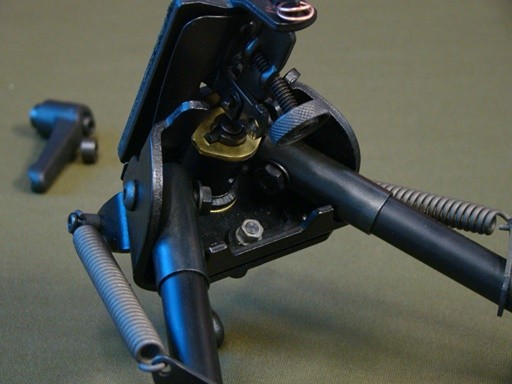
If you remove the knurled wheel nut the tension stud and the locking pin can and will fall free of the bipod leaving you with a handful of pieces to reassemble. The knurled wheel nut is threaded on to the tension stud, to remove simply unscrew.
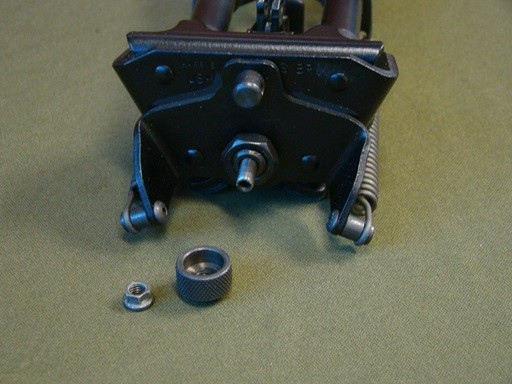
Step 2: Installing the Bipod Lever Lock
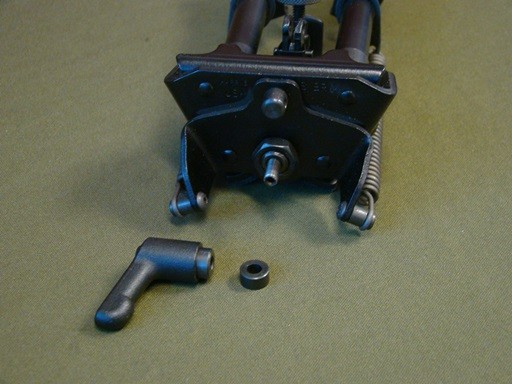
The Bipod Lever Lock will ship with a spacer. The spacer is required for installation. Slide the spacer over the threaded post/tension stud on the bipod while still holding the locking pin in place.
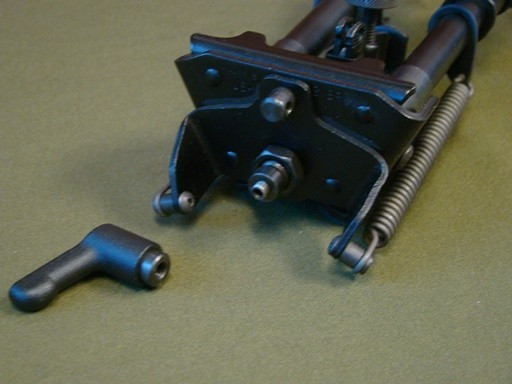
Step 3: Thread the new Bipod Lever Lock onto the tension stud. The Lever Lock is threaded and has an Allen Hex bolt in the top. There is no need to use a tool for this part of the installation. Simply thread the Lever Lock on the tension stud until snug. Do not over tighten or you will risk damaging your bipod. Once the Bipod Lever Lock is installed the locking pin can be released. Make sure the locking pin is aligned after installation.
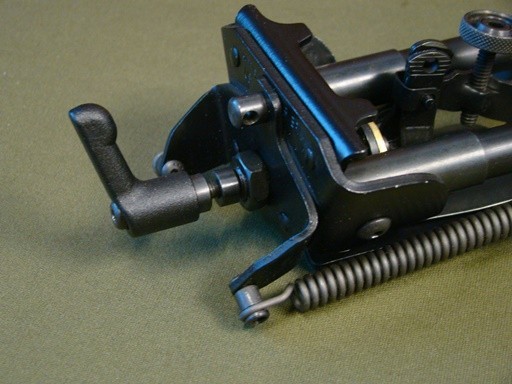
Installation complete.
Adjusting: The Bipod Lever lock if turned left or clockwise, from behind weapon system, will tighten the tension. The Bipod Lever Lock has a ratcheting mechanism which allows the user to pull back, toward the butt of the weapon, to disengage the lever for re-positioning.
Most installations will have the Bipod Lever Lock snug when parallel to the left bipod leg (when extended) roughly the 7 o’clock position. Turning the Bipod Lever Lock to the right will loosen the tension and allow the weapon system to swivel.
Tags: Bipod


