


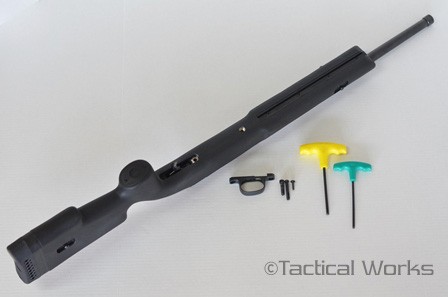
Project Savage: Choate Tactical Stock Installation

One of the upgrades that many shooters leverage is an upgraded aftermarket stock. In a previous post we detailed the feature’s that this shooter is looking for which are drop-in-fit, full length bedding block, pistol grip, free-floating barrel, immediately available, and not too expensive. The Choate Tactical Stock fit the bill and the decision was made.
The rifle is a Savage 10 Hog Hunter in .223. The Hog Hunter ships with an economical stock better known as the “Tupperware” stock. The stock does have bedded pillars but is too flexible for reliable repeatable groups. Some Savage rifles have the Accustock which will have three action screws. The Savage Target Actions will also have three actions screws. The Hog Hunter has two action screws. This installation will focus on Savage actions that have two screws however we will try to address the three screws actions where we can.

Before starting work on any firearm be sure that the firearm is clear. Do not touch the trigger until the firearm has been cleared. Inspect the chamber to ensure that it is clear of ammunition and that there is no ammunition positioned to be chambered. If possible, remove the bolt from the rifle before starting work. Do not keep live ammunition near your work-space Once you have checked the firearm, check it again! And again!
Tactical Works, Inc. takes no responsibility for the accuracy and/or safety of this “how to”. This post is simply for your reading enjoyment. Before shooting any firearm have it inspected by a qualified gun smith.

Installation of a Choate Savage Tactical Stock
Tools:
- 5/32″ Hex Key
- 3/16″ Hex Key
- Inch Pound Torque Wrench
- Thread Lock
Total Time:
- Work Time: 15 minutes
- Total Project Time: 15 minutes
Step 1: Remove the Bolt.
This step is not necessary however it is highly suggested that the bolt is removed from the action. In some cases the action screws might be too long and will protrude into the action. If the bolt is installed before checking the length of the action screws it’s possible to damage or ruin your bolt body.

To remove the bolt from Savage actions that have the bolt release on the top right side of the action simply rack the bolt back to the bolt limiter and then push the bolt release down while pressing the trigger. This should allow the bolt to be removed from the action.
Step Two: Action Screws
As noted prior, the Savage 10 Hog Hunter has two action screws. The Accustock and Target Actions will have three actions screws.
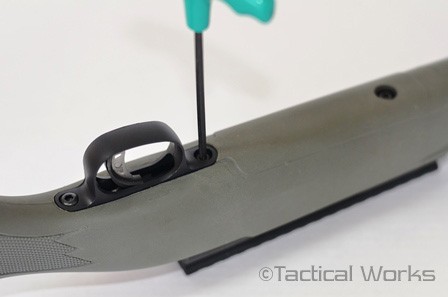
This is a little confusing because when looking at the bottom of the stock there are three screws on the Hog Hunter. The furthest screw toward the butt stock is the trigger guard screw. Typically this is just a “wood” screw that holds the back of the trigger guard into the stock. This is not an action screw.
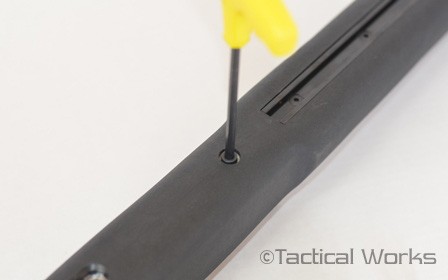
To remove the Trigger Guard screw use a 5/32″ hex wrench and simply turn counter clockwise to unscrew. Set the trigger guard screw aside for now as you will need it for the new Choate Tactical Stock.

The next step is to remove the rear action screw. The rear action screw is in the front of the trigger guard. Use a 5/32″ hex wrench to remove. Again, counter clockwise will loosen the action screw.
Next, remove the front action screw. Using a 5/32″ hex wrench, turn counter clockwise to unscrew.

Once the trigger guard screw and the front and rear actions screws are removed the barreled action will drop free from the stock. Do this work on a bench or the floor or at least be prepared to catch the barreled action when it falls free from the stock.
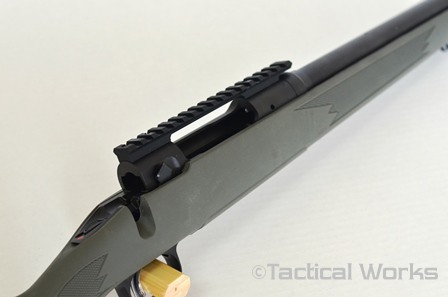
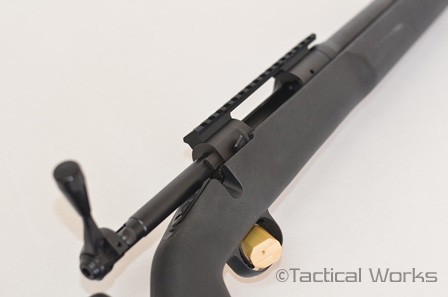
Step Three: Install the barreled action into the new Choate Tactical Stock.
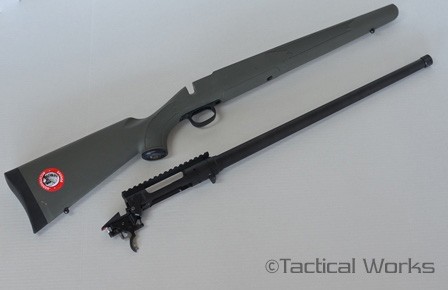
Above is the barreled action removed from the original “tupperware” stock. Below is the barreled action ready to be installed into the new Choate Tactical Stock.

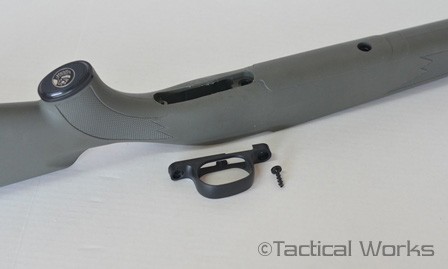
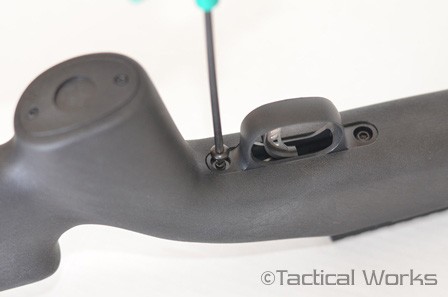
By turning the Choate Tactical Stock over you should notice the two action screws and the inlet for the OEM trigger guard. It is a good idea if your rifle shipped with a plastic trigger guard to purchase an upgraded metal/aluminium trigger guard. A metal/aluminum trigger guard is more rugged as allows for a more precise torque when tightening the action screws.

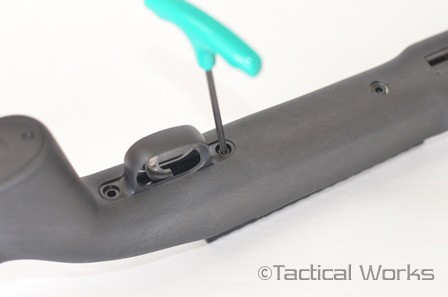
With the barreled action in the new stock, turn the stock over for easy access to the action screws and trigger guard.
With the barreled action in the new stock thread the front action screw through the stock and into the receiver. Make sure to take your time and use very little force when starting the action screw. It is very easy to cross thread the action screw if special care is not taken.
To seat the recoil lug against the aluminium bedding block lightly tighten the front receiver screw. Hold the rifle in an upright position (roughly 45 degrees) barrel pointing up, bump the butt of the rifle against the floor. This will help to center the action in the stock and seat the recoil lug.
Next thread the rear action screw. Again being very careful not to cross thread the screw. At this point only hand tighten the rear action screw.
Torque the front action screw to 20 inch-pounds
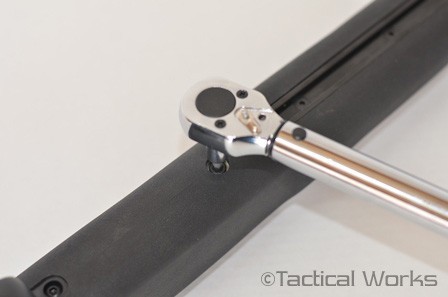
Then tighten the rear action screw to 20 inch-pounds. Increase the torque by 5 inch-pounds starting with the front action screw and then the rear until the torque is at 65 inch-pounds.
65-inch pounds is Choate’s suggested torque specification for the Choate Tactical Stock.
The following are Savage’s Torque Specifications:
Factory Synthetic Stocks = 25-26 in/lbs
Hardwood Stocks = 45 – 65 in/lbs
Laminated Stocks = 45 – 65 in/lbs
Aftermarket Synthetic Stocks = 45 – 65 in/lbs
There are many theories on the correct torque settings from “hand tight”, tuning, to 65+ inch-pounds. Torque settings depend on variables such as material of the stock, manufacture of the stock, bedding pillars, bedding block, bedding, bottom metal vs. blind magazine, etc. If you do not agree with the manufactures specifications feel free to do research to find what is right for your configuration.

The final screw is the rear trigger guard screw. This screw simply holds the rear of the trigger guard into the stock. The screw will be a little tight to start with because Choate simply drills a pilot hole for the screw and the screw will need to cut new threads. This screw should be snug and will depend on which trigger guard you’re using metal vs. plastic. Some specify the torque settings should be 25 inch-pounds.
Step 4: Installing the bolt
First visually inspect the action to ensure that the action screws do not protrude into the action. The rear action screw should be easy to see, the front will be a little more difficult. It may be necessary to use a flashlight. If you cannot see the action screw you may want to use a finger and “feel” to make sure the screw is not too long.
If any of the screws are too long and inhibiting the installation of the bolt it will be necessary to cut down the screws to the proper length. This can be done with a grinder, file, or saw. Remove the screws from the action and if possible, thread a nut on the action screws prior to cutting. Once the screw is cut to the desired length back the nut off of the action screw to help clean the threads.
If the action is clear and the action screws are the correct length, press on the trigger to allow the bolt release to be pushed down. Once the bolt release is depressed the bolt should freely slide into the action. If the bolt stops short or hangs up do not force. Remove bolt and check the length of the action screws again.
Project complete.

Below is an article by Stan Pete of Team Savage regarding tuning the action screws to maximize the accuracy for your rifle. The full article can be found at https://www.accurateshooter.com/technical-articles/savage-action-screw-torque-tuning/
Seat Recoil Lug and Start with Front Action Screw(s)
On the model 12, I will first ensure that the recoil lug is seated securely against the stock by just lightly tightening up the front receiver screw then gently but firmly bumping the butt pad against the floor. Next I will tighten up the front two receiver screws to 30 inch-pounds starting at 20 inch-pounds and working up to the 30 inch-pounds in 5 inch-pound increments, and always tightening the front screw first and then the second screw. Once the front two receiver screws are torqued to the final torque setting, I will set the rear receiver screw to 5 inch-pounds and shoot a 5-shot group [to evaluate accuracy].
Savage Action Screw Torque Tuning
The goal here is to find the “sweet spot” for the rifle in relation to the torque settings used on the receiver screws. The proper torque settings [can vary] from rifle to rifle, but they will usually have a noticeable effect on consistent group sizes. A properly-torqued rifle will optimize the “harmonics” of the barreled action using the receiver screws so that the gun delivers peak consistency.
Here is the process I have found that works for me in tuning a Savage rifle receiver to peak accuracy. To use my process you first must already have a load that shoots accurately and consistently in your rifle, and I always use a fouled barrel like I’d be shooting in a match. This process works for me in both the model 10 (two receiver screws), and the model 12 (three receiver screws).
Seat Recoil Lug and Start with Front Action Screw(s)
On the model 12, I will first ensure that the recoil lug is seated securely against the stock by just lightly tightening up the front receiver screw then gently but firmly bumping the butt pad against the floor. Next I will tighten up the front two receiver screws to 30 inch-pounds starting at 20 inch-pounds and working up to the 30 inch-pounds in 5 inch-pound increments, and always tightening the front screw first and then the second screw. Once the front two receiver screws are torqued to the final torque setting, I will set the rear receiver screw to 5 inch-pounds and shoot a 5-shot group [to evaluate accuracy].
Increase Torque Incrementally on Rear Action Screw
After the group is shot and I am satisfied that I called all of the shots as good shots I will allow the rifle to cool off to about the temperature that the fist group was shot at. I will then add 5 inch-pounds to the rear receiver screw and shoot another five-shot group and allow the rifle to cool again. I repeat this process until I have tightened the rear receiver screw to 40 inch-pounds or have seen the groups get smaller and then start getting larger again. Once you have seen the groups decrease and then start to increase in size then you will have found the area of torque to work in. You can then can fine tune this to the exact inch-pound torque settings.
Tuning a Model 10 with Two Receiver Screws
The Savage model 10 action, which has two receiver screws, uses the same process as the three-screw model 12. Measure your group sizes and place the measurements in front of you so that you can see the bell curve showing where your best groups were achieved. NOTE — there may be a better way of doing this and if you should have one, I’d be very interested in hearing it. Good shooting and I hope to see you all on the range.