Installing the Savage Improved Extractor Kit

Posted in DIY, New Kit, Product Reviews, Savage on December 1st, 2017 by Preston Lewis

WARNING

Warning!

Before starting work on any firearm be sure that the firearm is clear. Do not touch the trigger until the firearm has been cleared. Inspect the chamber to ensure that it is clear of ammunition and that there is no ammunition positioned to be chambered. Do not keep live ammunition near your workspace. Once you have checked the firearm, check it again!

Tactical Works, Inc. takes no responsibility for the accuracy and/or safety of this “how to”.  This post is simply for your reading enjoyment. Before shooting any firearm have it inspected by a qualified gunsmith.


In this Do-It-Yourself Tutorial, we will be installing the Savage Improved Extractor Kit.

List of tools you need to accomplish this installation successfully.

  • Clean Workspace
  • Tweezers
  • 1/6″ punch
  • Small mallet
  • Small flathead screwdriver
  • Compressed air or canned air
  • 4″ piece of packing tape
  • Gun oil
  • Good set of eyes (joking but for real!)

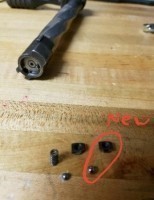
This kit consists of a modified extractor, larger extractor detent ball, and custom ejector and ejector spring.
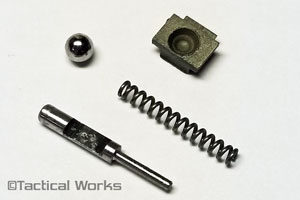
*Some of the installation pictures show the original kit parts. The new kit parts (pictured above) may look slightly different but the installation steps are the same.

Step 1: Remove the bolt from your rifle.

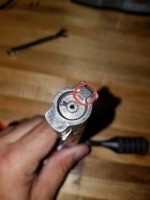
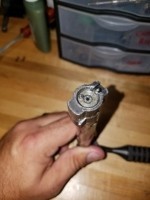
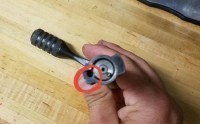
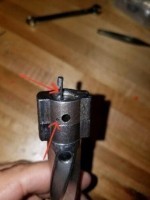
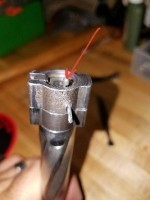
Step 2: In this step, we will be removing the OEM Extractor from the bolt head. Take your flathead screwdriver (make sure it is small enough to fit in the slot in front of the extractor) and place it flat against the extractor. With a small amount of pressure, push the extractor toward the outside of the bolt face as shown in Figure 2-1.  Make sure while you are pushing the extractor that you keep a hand over the bolt face because the detent ball underneath the extractor will shoot out if you’re not careful.  See Figure 2-2.

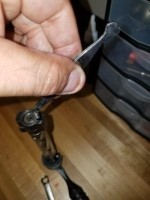
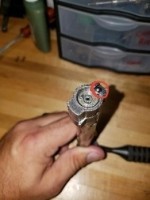
Step 3: Once the extractor is clear of the bolt and the detent ball is captured, use your tweezers to pull the spring out of the blind hole. See Figure 3.1. Lay the OEM extractor and detent ball on the piece of tape as shown in Figure 3.2. Lay the spring to the side as you will reuse it with the new extractor. Figure 3.3.

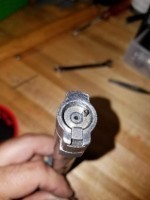
Step 4: Once the spring is removed from the blind hole, take your air compressor or canned air and blow the blind hole out to get any residual dirt, dust or grime out. Apply a few drops of gun oil into the hole as well as on the spring and place the spring back into the blind hole (either direction, doesn’t matter). See Figure 4.1. 

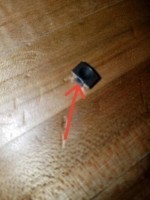
Step 5: Place the new (larger) detent ball on top of the spring. It should sit on the spring sticking out above the bolt face. See Figure 5.1. 

Step 6: In Figure 6.1, notice the new extractor plate. The detent ball indention faces the bolt and the extractor lip faces the inside of the bolt face.

Step 7: Slide the new extractor into the slots in the bolt head until it contacts the detent ball as shown in Figure 7.1. Use your small flathead screwdriver and carefully push the detent ball down below the surface of the bolt face and slide the extractor plate in over the detent ball simultaneously. You will hear it snap into place. See Figure 7.2.

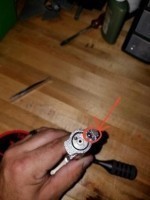
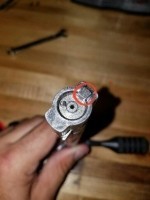
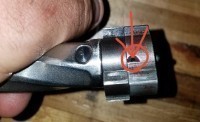
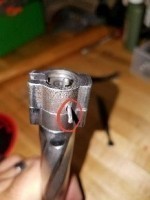
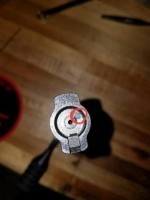
Step 8: Look for the ejector pin hole on the opposite side of the bolt as the extractor. This pin only comes out one way and only goes in one way. You will see an inlet on the top of the bolt head. This is the side where you will insert your punch. See Figures 8.1 and 8.2 for pin removal direction. Use your 1/16″ punch and insert it into the hole. Lightly tap the pin out of the bolt head until the pin is clear of the bolt head. Cup your hand over the bolt face and pull the punch out in the opposite direction.

Note*** Be sure that you capture the ejector rod and spring when you extract the punch as it is under pressure and will projectile if your hand is not over the face of the bolt.


Step 9:  Again, use your air compressor or canned air to blow out the ejector rod hole making sure to get any trash or sand out. Apply a few drops of gun oil into the hole and the new ejector spring as shown in Figure 9.1.

Step 10: Install the new ejector spring onto the new ejector rod. If you look at the ejector rod (as shown in Figure 10.1) there is a slot cut out on one side of the rod. Position the “cutout” facing toward the small extractor retention pin. Once you have the cutout in the ejector positioned correctly toward the pin, insert the ejector and spring into the blind hole.

Step 11: This next step is a little tricky…. Use your thumb to depress the ejector into the hole while simultaneously pushing the pin into the retention hole. Remember that the pin can only be inserted one way. See Figure 11.1.

Step 12: Once the pin is in place, push the ejector down a few times to make sure that is functions correctly and doesn’t bind. See Figure 12.1

Step 13: Install the bolt back into the action and cycle it forward and back. Hand feed an EMPTY case into the chamber and close the bolt. Cycle the bolt. Cycle the bolt rearward and make sure that the case ejects and kicks away from the gun. If this is successful, YOU ARE FINISHED!

**Note: Sometimes with installation you will find your bolt is hard to close. With the new parts being all stainless steel they are stiffer and may need some help mating up and breaking in. If you experience this problem you will need to place an EMPTY CASE in the chamber and slam your bolt. You may have to work your bolt to loosen it and may need to cycle it as above several times (sometimes upwards of 100 times). Then you should be good to go. As always just call or email us with any questions or concerns.

The Savage Improved Extractor Kit is a great upgrade to your Savage 10/110 and Savage Axis rifle. With this kit, you won’t have to worry about hung cases or failure to extract anymore. And it will kick the cases further away from the gun. 

You’ll be glad you spent the time to install this kit. It really adds a piece of mind knowing that your rifle is going to eject without a doubt whenever, wherever.

As always,

See you on the range!!

Preston

Tags: , ,

Hunter Shaw joins Tactical Works, Inc.

Posted in Product Reviews, Sponsored Events on November 30th, 2017 by KrowRN

Contact: Team Tactical Works  FOR RELEASE ON 11/30/2017 11:00 A.M.
Tel.: 970.672.0765
Email: [email protected]
Website: www.tacticalworks.com

Tactical Works, Inc. announces the addition of Hunter Shaw to Team Tactical Works.
Hunter will be joining Team Tactical Works Inc. as a sponsored shooter, product tester/reviewer and consultant. 

Colorado Springs, CO, November 30th – Hunter Shaw is an avid outdoorsman, full-time dad and a husband. He has enjoyed the outdoors and been a gun enthusiast ever since he was young.
Hunter Shaw joins Tactical Works
As soon as he entered the world of long range shooting and F-Class, he was hooked. His best finishes to date are 3rd place at Core Shooting Solutions Long Range Challenge PRS club match and Gulf Country Gun and Rifle Club’s monthly F-Class match.

Hunter is a sponsored Team Tactical Works shooter as well as a product tester and “TW Think Tank” member. He and Preston Lewis shoot team matches together, get in range time and reloading time weekly, and share knowledge of guns and long range shooting.

“As a full time dad and contractor, I stay busy but still find time to practice and compete. I am looking forward to building a great relationship with Team Tactical Works.”

Tactical Works, Inc. is headquartered right outside the downtown area of beautiful Denver Colorado.

Our company mission is simple, provide our customers a simple and secure area to acquire reputable firearm accessories while providing superior customer service.

To help us with our mission our main goal is to offer quality firearm accessories from companies who stand behind their products.  

Our customers are military, law enforcement, competition and recreational shooters who need to depend and trust on their weapons platform.

If you would like more information about this topic, please call Team Tactical Works, Inc. at 970-672-0765, or email [email protected].

Crosstac Saddle Bag Review

Posted in New Kit, Product Reviews on October 13th, 2017 by Preston Lewis


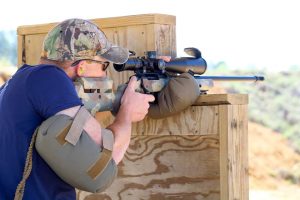
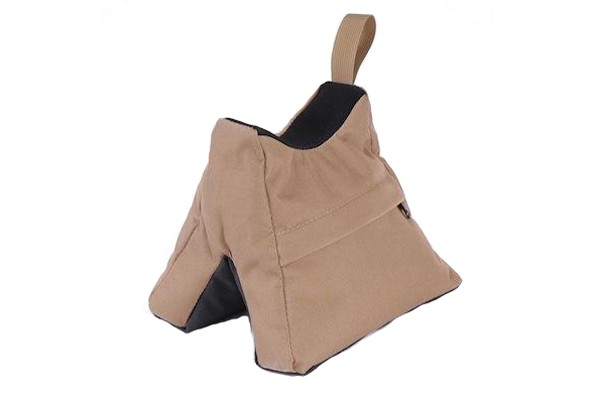
When I received the Original gen1 Crosstac Saddle Bag, I was very impressed with the quality and workmanship in this shooting bag. I was looking for a bag that can be used on pretty much any barricade that PRS match directors can throw at you. I have always been a comfortable shooter that carried different bags around with me in a match to suit different barricades (rear bag, strap on bag etc.) until the Crosstac saddle bag showed up on my doorstep. The first thing I did with this bag was set it on a railing to see how it would support my gun by itself. To give you an idea, I shoot a 6.5 Creedmoor on an MDT TAC21 chassis with a 24 in barrel (12.4 lbs) and I can lay this weapon system on the bag and simply let go of it. With that being said, long range precision shooters dream about having a bag that will steady a gun like this. The first time I used it, I shot out to 1020 yards 5x with no misses.

Crosstac Saddle Bag


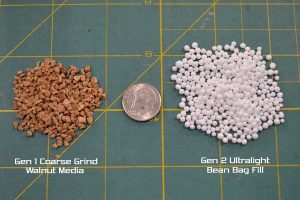
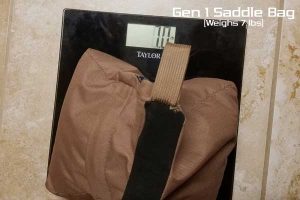
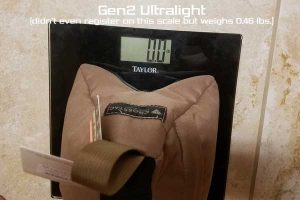
Lisa called me and asked if I would try out the new Crosstac Gen2 Ultralight Saddle Bag. The item showed up and I could not believe how lightweight this thing was. The bag itself is the exact same as the gen1 saddle bag except for the fill. The gen1 uses a coarse ground walnut fill weighing in at about 7lbs versus the gen2 bag being filled with a ball bearing size Styrofoam weighing in at a little under a pound. Back to the range with the gen2 bag and my fears were confirmed. With rifle stability being one of the main components of long range shooting, the gen2 bag did not hold the gun near as well because the Styrofoam does not mold in place like the crushed walnut media of the gen1.

Crosstac Shooting Bag Media


Crosstac Gen 1 Saddle BagCrosstac Gen 2 Ultralightweight Saddle Bag


I had a few of my PRS team buddies up to see what they thought about it.

Will, “It would be nice to run around with a lightweight bag but I definitely like the way the gen1 bag cradles my gun.”

Dennis, “For an older shooter, I like the gen2 saddle bag because of the weight. I would not sacrifice weight for accuracy in a match though.”

Hunter, “For the saddle bag concept as a whole, you can do a lot of different things with it. It’s nice to have lightweight gear for matches or for hunting but in a match where points are on the line, I want something that is going to be very stable. The gen1 bag is definitely the one for me.”


With that being said, everyone has their own opinions. I do like that Crosstac gives you the option to unzip the bag and put whatever fill you would like in there (including my son who likes to hide his little army men in mine). Maybe they could give you the option to order both types of fill so you could switch them out for different applications or even mix them for a happy medium of lightweight bag and great weapon stability. For me, I’m going with the gen1 Crosstac Saddle Bag. Until next time!


Preston Lewis joins Team Tactical Works, Inc.

Posted in Product Reviews, Tactical Works Home, Uncategorized on September 27th, 2017 by Team TW

Contact: Team Tactical Works  FOR RELEASE ON 9/27/2017 11:00 A.M.
Tel.: 970.672.0765
Email: [email protected]
Website: www.tacticalworks.com

Tactical Works, Inc. announces the addition of Preston Lewis to Team Tactical Works.
Preston will be joining Team Tactical Works Inc. as a sponsored shooter, product tester/reviewer, author, contributor, and consultant. 

Colorado Springs, CO, September 27 – Preston Lewis was born and raised in Panama City, FL. He is an avid hunter, fisherman, full-time dad and a husband. He enjoys the thrill of long-range shooting or anything to do with firearms for that matter.

Preston has been around guns his entire life however over the last 8 years, when he is not spending time with his family he devotes most of his free time to the science of long-range shooting sports. Preston shoots matches as a member in the Precision Rifle Series as well as F-Class.

When Preston isn’t shooting he spends his free time reloading for practice and matches and tuning rifles for himself and others.

Preston is a sponsored Team Tactical Works shooter as well as an author, product tester, “TW Think Tank” member and contributor.

“I am honored to be a part of Team Tactical Works. The folks at Tactical Works, Inc. are wonderful people to work with. If you need anything for long range shooting, you’ve come to the right place! See you at the range.”

Tactical Works, Inc. is headquartered right outside the downtown area of beautiful Denver Colorado.

Our company mission is simple, provide our customers a simple and secure area to acquire reputable firearm accessories while providing superior customer service.

To help us with our mission our main goal is to offer quality firearm accessories from companies who stand behind their products.  

Our customers are military, law enforcement, competition and recreational shooters who need to depend and trust on their weapons platform.

If you would like more information about this topic, please call Team Tactical Works, Inc. at 970-672-0765, or email [email protected].

Tags:

Project Savage: Choate Tactical Stock

Posted in Choate, Product Reviews, Project Savage, Savage, Tactical Works Home, Uncategorized on August 20th, 2013 by Team TW


Choate Savage Tactical Stock10

One of the most common upgrades for Savage 10/110 rifles is an upgraded stock.  The original “Tupperware” stock is very lightweight and is easy to handle however, in some situations the OEM Savage stock is too light.  If this was a dedicated hunting rig that would see miles on foot in the back country it might be a good stock however, it would need to be “enhanced” to overcome some of the weaknesses.

Read more »